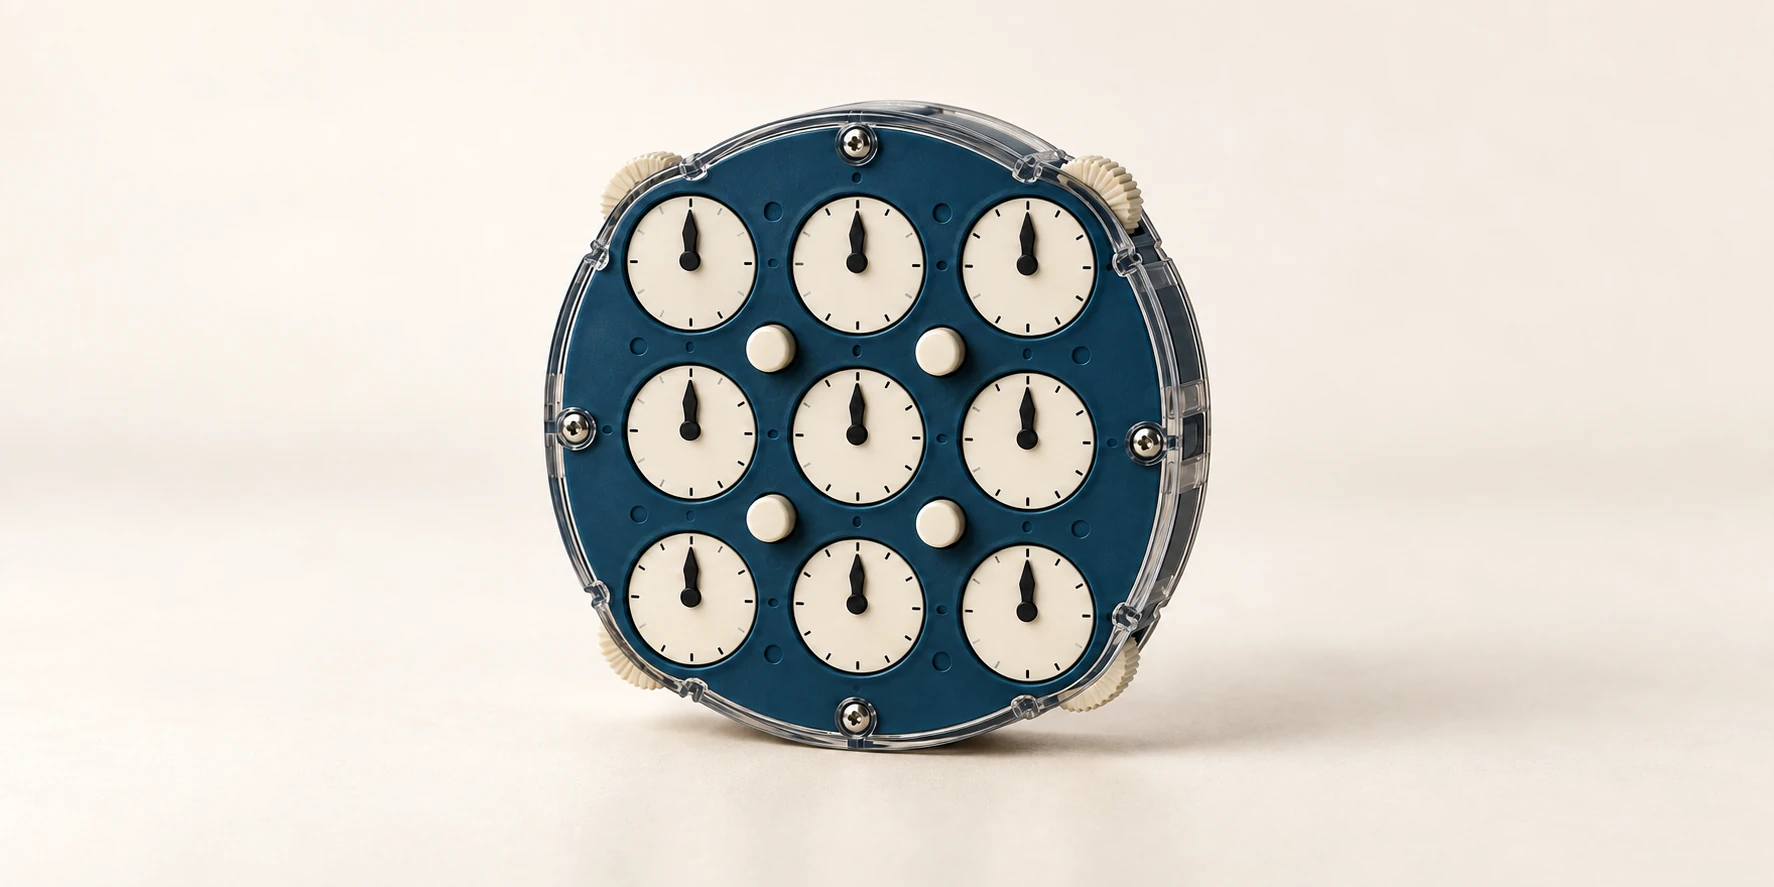
Clock: 7simul Flip, from Memo to Solve
Memo calculations and the seven steps of 7simul Flip for Clock, with a worked solve.
7simul Flip solves Clock with six memo values and seven steps using two wheels at once. Perform three steps on the front, flip with x2, then perform four steps on the back. Every step uses the upper-left and upper-right wheels in your current view.
If you are still learning how the pins connect the dials, complete a basic solve ↗ first.
Coordinates, directions, and differences
Name the front dials UL U UR / L C R / DL D DR. Use lowercase for the back. To inspect the back, always use x2: flip over a horizontal axis running from left to right. Use another x2 to return to the front.
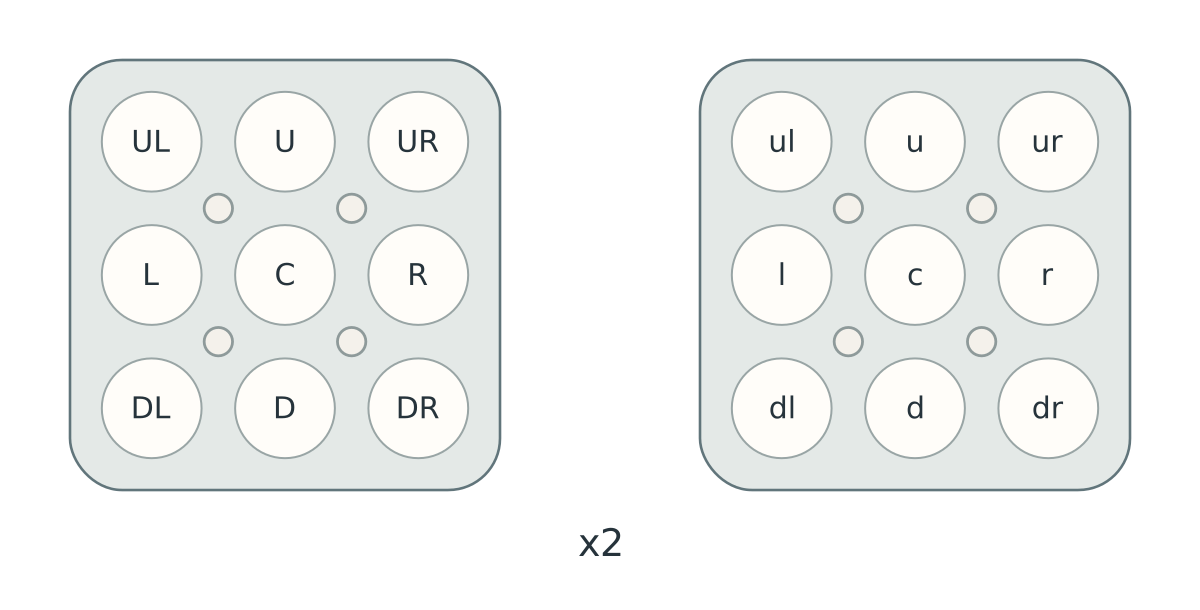
Letters name positions in the view shown: ul is the upper-left dial after the flip.
The UL dial is a clock face, the UL pin is a button, and the UL wheel is a turning wheel. Pin and wheel names in the execution tables always refer to the current view.
For calculations, assign 0 to straight up in the current view, then count clockwise from 1 to 11. A→B means the turn that brings A’s hand to B’s direction, so its value is B−A, modulo 12. Positive means clockwise from the face you are viewing; negative means counterclockwise. For example, if A points to 9 and B to 7, then A→B = 7−9 = −2. Likewise, −7 and +5 give the same difference.
After x2, the printed 12 on the back face points downward in your view. Continue using straight up as 0 to calculate differences, but finish by aligning to the printed 12, which now points down. The solved back face therefore reads 6 in these viewing coordinates.
The six memo values
Use m₁–m₆ for the memo values so they remain distinct from the execution step numbers. Uppercase and lowercase refer to the front and back coordinates above.
| Memo | Calculation | Used for |
|---|---|---|
| m₁ | (R→D) + (l→ul) | Step 1, left wheel |
| m₂ | u→c | Step 1, right wheel |
| m₃ | l→u | Step 2, right wheel |
| m₄ | (r→d) + (L→UL) | Step 4, left wheel |
| m₅ | U→C | Step 4, right wheel |
| m₆ | L→U | Step 5, right wheel |
Reduce results to −5 through 6; a six-hour turn can go either way. You can memorize signed numbers directly. For a compact optional encoding, use A=−1, B=−2, C=−3, D=−4, E=−5, keeping 0–6 as digits. C in a memo string means −3; C in a calculation still names the front center dial.
A complete memo example
Start with both faces solved and apply this scramble in WCA notation. The scramble’s y2 flips left to right. After finishing the scramble, perform one more y2 to return to the face that faced you at the start; call that the front. Use x2 for all subsequent memo and execution flips.
UR3- DR4- DL1- UL2- U1+ R4+ D2- L3- ALL1+ y2 U3- R1- D4- L4+ ALL1+ DR DL ULThese are the starting hand positions, using straight up in each view as 0.
| Row | Front: left / middle / right | Back after x2: left / middle / right |
|---|---|---|
| Top | UL=0, U=10, UR=1 | ul=7, u=6, ur=8 |
| Middle | L=6, C=3, R=9 | l=11, c=3, r=4 |
| Bottom | DL=11, D=7, DR=10 | dl=6, d=7, dr=5 |
| Memo | Substitution | Shortest turn | Encoding |
|---|---|---|---|
| m₁ | (7−9) + (7−11) = −6 | 6 | 6 |
| m₂ | 3−6 | −3 | C |
| m₃ | 6−11 | −5 | E |
| m₄ | (7−4) + (0−6) | −3 | C |
| m₅ | 3−10 = −7 | 5 | 5 |
| m₆ | 10−6 | 4 | 4 |
The memo is 6 C E / C 5 4. The slash separates the values used before and after the execution flip. After reading the back, return to the front with x2 to begin execution.
The seven execution steps
Listed pins must protrude toward you; press all others away. Set the pins before turning either wheel. The two wheels can turn simultaneously, but turning them separately produces the same result during practice. “Align D→R” means to inspect their current directions, then turn the indicated wheel until D points where R currently points.
Front: steps 1–3
| Step | Pins toward you | UL wheel | UR wheel |
|---|---|---|---|
| 1 | UL, DR, DL | m₁ | m₂ |
| 2 | UL, DL | Align D→R | m₃ |
| 3 | UL | Align C→D/R | Align DR→D/R |
Flip with x2
Flip over the horizontal axis. The original back now faces you, with the printed 12 pointing down. Continue using UL, UR, and the other names for positions in this new view, and reset the pins for step 4.
Back: steps 4–7
| Step | Pins toward you | UL wheel | UR wheel |
|---|---|---|---|
| 4 | UL, DR, DL | m₄ | m₅ |
| 5 | UL, DL | Align D→R | m₆ |
| 6 | UL | Align the upper-left group containing C→D/R | Align DR→D/R |
| 7 | UL, DR | Align the seven dials other than UR and DL to the printed 12 | Align UR and DL to the printed 12 |
After step 6, the seven dials other than UR and DL should match, and UR and DL should match each other.
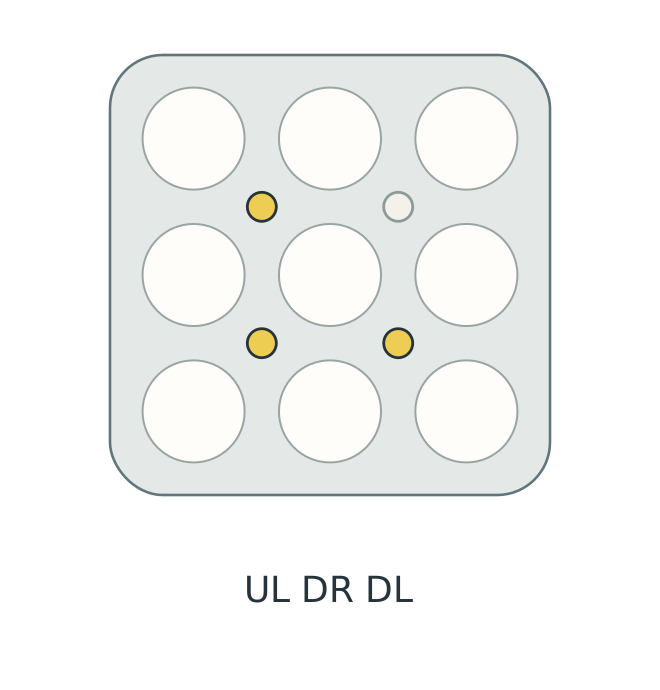
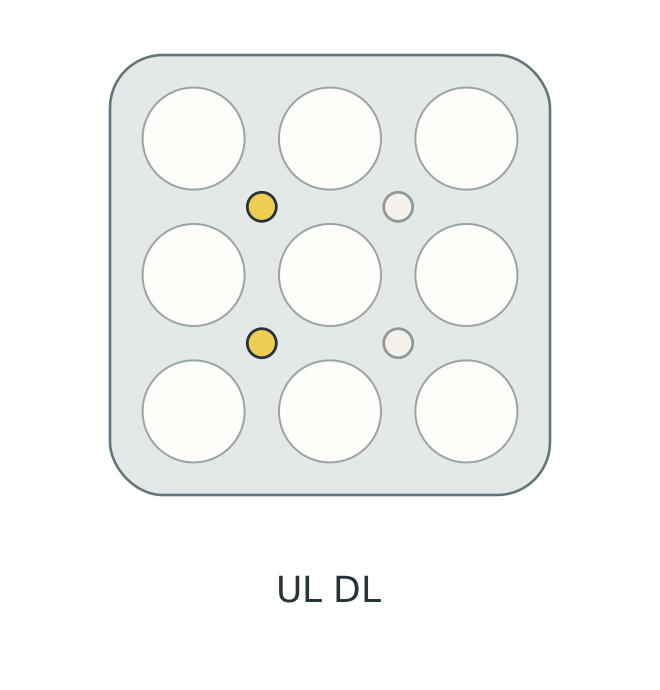
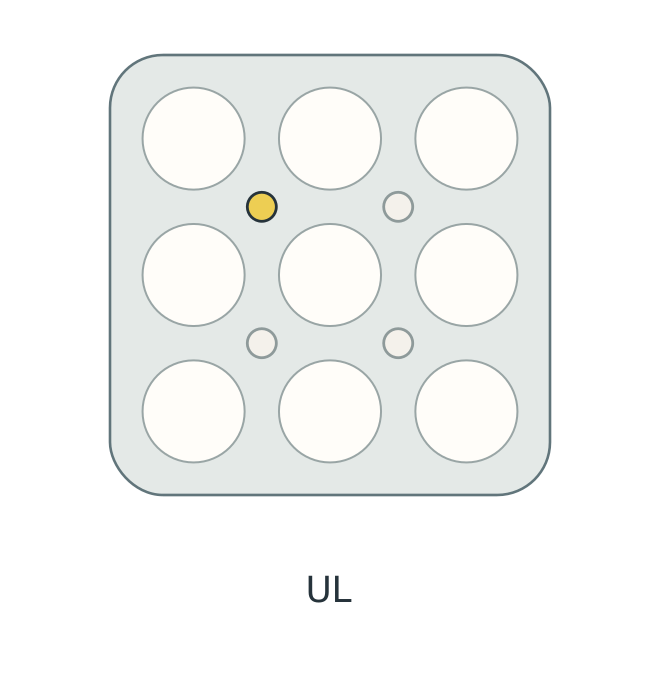
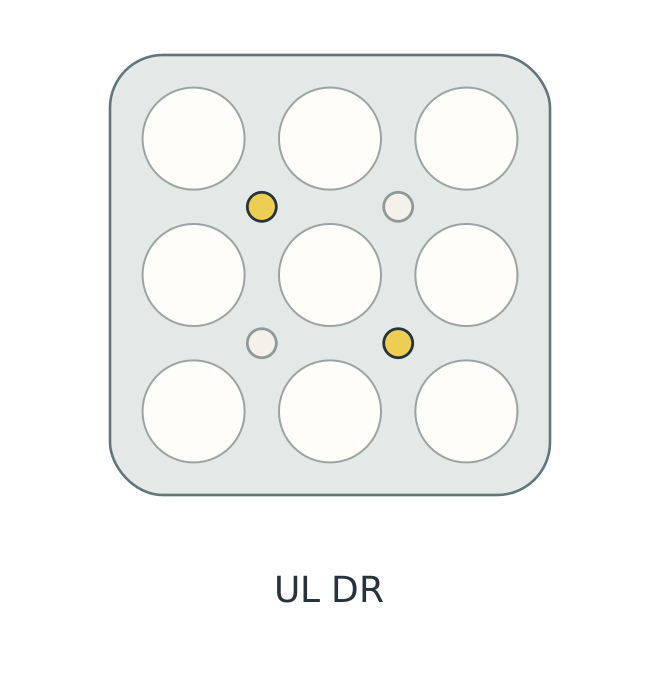
Filled gold circles indicate protruding pins; hollow circles indicate pressed pins. The dials provide position references and do not show the current hand positions.
Check the example during execution
The scramble above produces these turns. Each sign refers to the current view; left and right mean the UL and UR wheels.
| Step | Left / right turn | Check after execution |
|---|---|---|
| 1 | 6 / −3 | — |
| 2 | 2 / −5 | D=R=3 |
| 3 | 4 / 4 | C=R=D=DR=3 |
| x2 | Flip top to bottom | Printed 12 points down |
| 4 | −3 / 5 | — |
| 5 | −3 / 4 | D=R=5 |
| 6 | 4 / −5 | Seven dials at 5; UR=DL=7 |
| 7 | 1 / −1 | This face is all 6; flip back and the front is all 0 |
References
- 7simul Flip video tutorial ↗
- Tommy’s 7simul tutorial ↗
- Clock beginner tutorial ↗
- Jaap’s Puzzle Page · Rubik’s Clock ↗